MEMBERS ONLY: To gain full access to the Half Yard Club projects please login or sign up
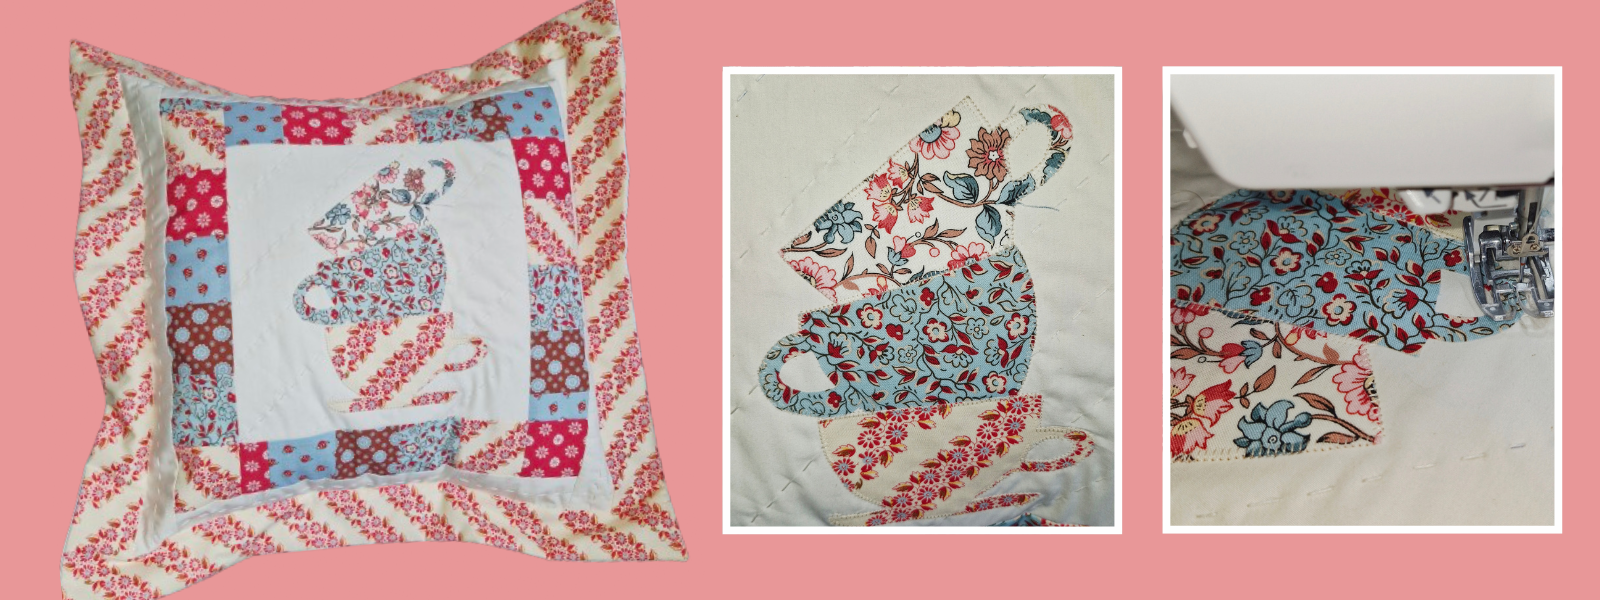
Appliqué and Patchwork Cushion | Guest Designer Suzie Duncan
Easy |

Quick Links: What you'll need Project steps
Guest designer Suzie Duncan brings us this tea-rific cushion that incorporates appliqué, patchwork and quilting so you can practise all your skills in one go!
Suzie’s quilt designs are always popular, so we are delighted to be able to share this one with you. Check out her other designs online and look out for her upcoming book, The Beginner’s Guide to Quilting.
In addition to its good looks, one of the great things about this cushion cover is that there are so many opportunities to make it your cushion your way, adapting it to your own skill set and taste: Choose fabrics in your favourite colours and patterns: they can be patterned, striped, checked or plain, although I would recommend a plain fabric for the background. Make the quilting as simple or complex as you like and sew by hand or machine as desired. I added hand-stitched diagonal lines of quilting on the cushion front, but you could sew this on your machine or go to town with some free-motion machine stitching. You can also experiment with the stitch for the appliqué and perhaps try out a machine blanket stitch, like the one I used, if your sewing machine has one. The important thing is to have fun and enjoy the process. The cushion front is created from the centre outwards, starting with a square for the appliqué and then adding a series of borders. Even the flange is basically a large border. The front panel is wadded so you can work the quilting stitches, and the back is a simple two-piece envelope back – probably the easiest type of cushion closure. I used my plain background fabric for the centre square, the second border and the back of the cushion and the fabric for the flange is used for one of the teacups and one of the fabrics in the patchwork border. The list of materials assumes you will do the same. If you want to use more or fewer fabrics, refer to the cutting list for your fabric requirements.Make it your own!
In addition to the options above, try the following:- Draw your own set of teacups for the appliqué at the centre of the cushion – you could copy your own favourite cups or create your dream versions.
- Add buttons, beads or sequins to the appliquéd teacups to help them stand out.
- Instead of the patchwork border use a single fabric for the border around the teacups using 2½in (6.5cm) fabric strips.
- For a stash-buster scrappy version, join 2½in (6.5cm) fabric pieces of different widths together into a 47in (120cm) strip to use for the patchwork border.
By the end of this project, you’ll have:
- Discovered a simple way of making a flanged cushion cover.
- Learned how to make an envelope-back.
- Practised all your quilt-making skills: appliqué, patchwork and quilting.
You may also like:
- Starburst Cushion by Suzie Duncan
- Christmas Present Cushion
- Reverse Appliqué Heart Cushion
- Wonky Street Pillow
Note: use a ¼in (5mm) seam allowance.
Finished size: 18 x 18in (46 x 46cm).
Want some more inspo?
Turn to our Facebook page or Pinterest
MEMBERS ONLY: To gain full access to the Half Yard Club projects please login or sign up
You will need:
Equipment
- Rotary cutter, quilter’s ruler and cutting mat
- Iron and pressing mat or ironing board
- Sewing machine
- Quilt basting spray
- Pins or clips
- Heat-erasable fabric marker
- Optional: walking foot and/or free-motion foot for the quilting
Materials
- 24in (61cm) x WOF of background fabric: I used plain white/cream fabric
- One fat quarter of fabric for the flange, one of the five fabrics of the patchwork border and one of the teacups
- One fat eighth each of four decorative fabrics for the patchwork border
- 5 x 3in (13 x 7.5cm) each of three different fabrics for the appliquéd teacups: if you want to use the same fabrics as in the patchwork border, you will already have enough fabric for these, or you can use three other fabrics
- Coordinating thread
- 16in (40.5cm) square cushion pad
- 21in (53cm) square of wadding: I used Vlieseline H640
- 5½ x 12in (14 x 30.5cm) of heat-fusible web (Bondaweb or Heat N Bond)
- Optional: embroidery thread and hand-sewing needle for hand quilting
Cut:
- One 9½in (24cm) square of background fabric for the centre panel: plain white/cream fabric
- Four 2 x 17in (5 x 43cm) strips of your background fabric for the outer border
- Two 13½ x 21in (34.25 x 53.5cm) rectangles of background fabric for the cushion back – or you could use other fabric if you wish
- Four 2½ (6.5cm) x width of fat quarter (21–22in/53.5–56cm) strips of fabric for the flange
- Five 2½ x 10½in (6.5 x 26.75cm) strips of fabric for the patchwork border: for one of these strips, I used my flange fabric, but you could use five different fabrics
MEMBERS ONLY: To gain full access to the Half Yard Club projects please login or sign up
Project steps:
Step 1
This is content that only logged members can see! Please create an account or login to be able to view project steps, otherwise you'll be limited to non-member content.
This is content that only logged members can see! Please create an account or login to be able to view project steps, otherwise you'll be limited to non-member content.
Step 2
This is content that only logged members can see! Please create an account or login to be able to view project steps, otherwise you'll be limited to non-member content.
This is content that only logged members can see! Please create an account or login to be able to view project steps, otherwise you'll be limited to non-member content.