MEMBERS ONLY: To gain full access to the Half Yard Club projects please login or sign up
How to Finish Your Block of the Month Quilt (2025)
Moderate |

Quick Links: What you'll need Project steps
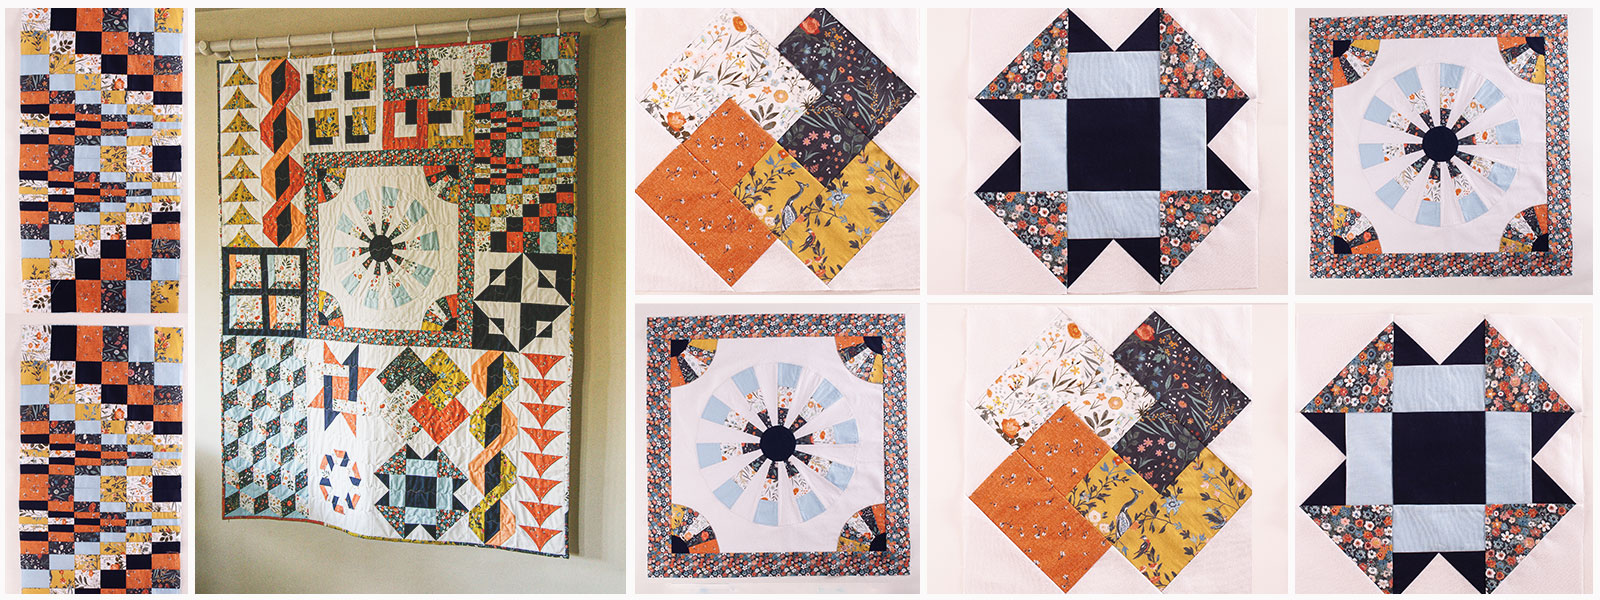
It’s time to join your quilt blocks, do some quilting, add the binding and complete your masterpiece!
Having completed all the blocks, we’re now ready to assemble the quilt and prepare it for quilting and binding. With this quilt it’s a fairly straightforward process: we’ll be joining the blocks together into two sections first, then stitching those sections together to form the quilt top. Once that’s done, you’ll need to tack the quilt top, wadding and backing together, quilt the layers and bind the quilt. Here’s how...
Tacking/basting your quilt
Once you’ve joined the blocks, your quilt top will need to be assembled in a ‘quilt sandwich’, with the patchwork right side up on the top, the wadding/batting in the middle, and the backing right side down on the bottom. Before stitching the layers, they need to be tacked/basted together, which you can do with needle and thread, safety pins, a tacking gun or spray adhesive.
If you’re tacking/basting, using pins or a tacking gun, start in the middle of the quilt and work your way towards the outer edges to stop the layers moving, smoothing the fabric as you go.
If you’re using spray adhesive, fold back the quilt top and wadding halfway, leaving the backing fabric exposed, apply the spray adhesive onto the wadding (not the backing fabric), reposition in place and smooth out from the centre to the edges with your hands; repeat with the second half of the wadding. When you’ve secured the wadding to the backing fabric, this time fold back just the quilt top, and again spray half the wadding, smooth out the quilt top as before and repeat with the final top half of the quilt. You’re now ready to quilt.
Quilting the layers
As this is a modern design, we quilted the layers of the quilt sandwich on the machine with simple horizontal lines of stitching that complement the style, but you can quilt yours differently or even use of the services of a long-arm quilter if you prefer not to take on this part of the quilt yourself. Do be aware that some designs can take a long time to stitch, so take that into account when making your choice.
Binding your quilt
We used a double-folded scrappy binding to complete this quilt. Whether you use a scrappy or single-fabric binding you will need approximately 230in (5.85m) of 2½in (6.5cm) binding. If using a single fabric, cut six strips of fabric 2½in (6.5cm) wide across the width of your fabric. Cut off the selvedges and join the binding strips, right sides together, with a 45-degree angle (see my tip, Bias binding, for step-by-step instructions, if needed). Cut off the excess seam allowance and press the seam open. Repeat to join the remaining strips into one long piece in the same way.
By the end of this project, you’ll have:
- Made a quilt sandwich.
- Learned how to make and attach scrappy binding.
- Machine-quilted a project.
- Sewn a striking modern quilt.
MEMBERS ONLY: To gain full access to the Half Yard Club projects please login or sign up
You will need:
Equipment
- Sewing machine, with a walking foot or free-motion foot (if free-motion quilting) if you have one
- Spray adhesive, needle and thread, quilt pins or quilt gun and tacks (depending on your method of securing the three layers)
- Scissors
- Optional: fabric clips
Materials
- At least 52 x 64in (132 x 162.5cm) of wadding/batting – we used 80/20 (80% cotton/20% polyester)
- At least 52 x 64in (132 x 162.5cm) of backing fabric – If you’re joining 44in (112cm) wide fabric to create your backing fabric, ideally the seam should run down the centre (if you’re planning to have your quilt long-arm quilted, this seam should run across the centre)
- 15in (39cm) x full width of fabric for binding if using one fabric, or you can use up some of your leftover fabric as we did
- Thread for assembling the quilt top: for tacking (if that’s your preferred method for securing quilt sandwich) and for quilting
MEMBERS ONLY: To gain full access to the Half Yard Club projects please login or sign up
Project steps:
Step 1
This is content that only logged members can see! Please create an account or login to be able to view project steps, otherwise you'll be limited to non-member content.
This is content that only logged members can see! Please create an account or login to be able to view project steps, otherwise you'll be limited to non-member content.
Step 2
This is content that only logged members can see! Please create an account or login to be able to view project steps, otherwise you'll be limited to non-member content.
This is content that only logged members can see! Please create an account or login to be able to view project steps, otherwise you'll be limited to non-member content.