MEMBERS ONLY: To gain full access to the Half Yard Club projects please login or sign up
Patch the Gnome | Easy Sewing Pattern + Video Tutorial
Easy |

Quick Links: What you'll need Project steps
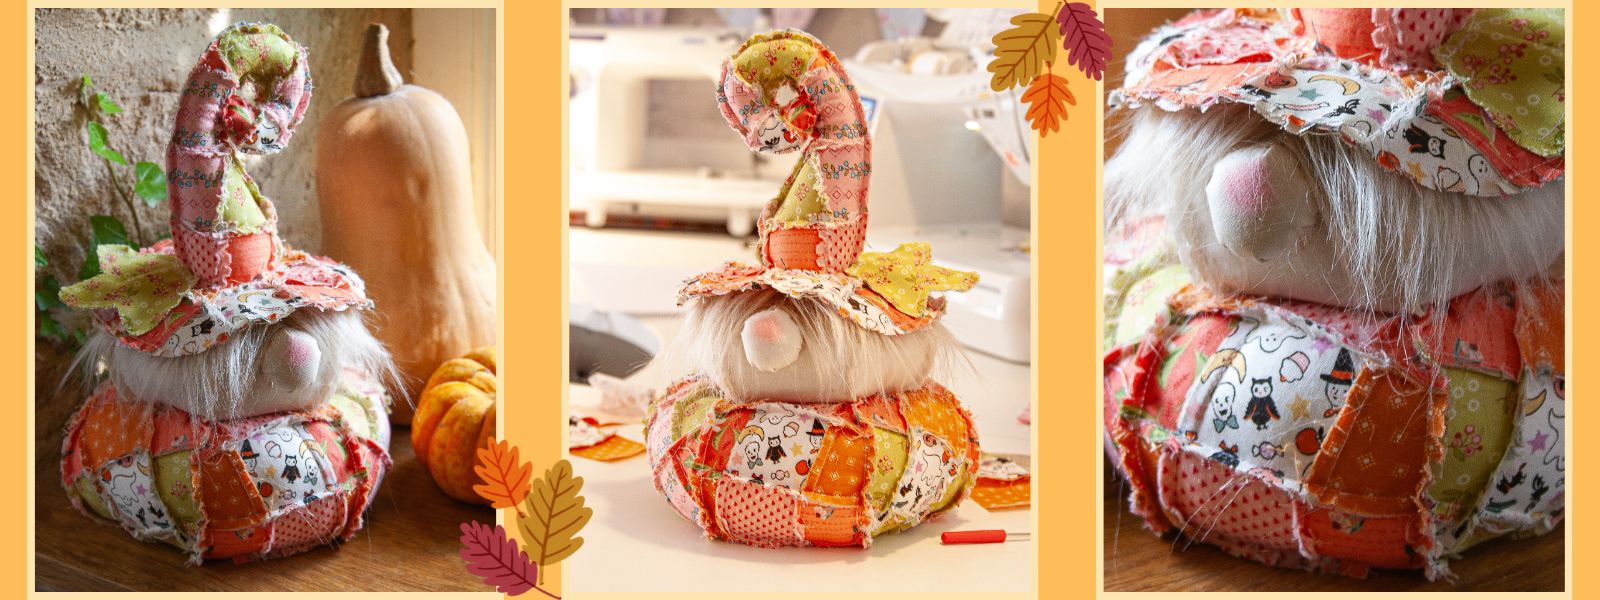
This adorable gnome is a great introduction to patchwork, no matter what your sewing level. It doesn’t matter if your stitching’s a little wobbly, and you don’t need many materials.
Patch is a friendly little gnome who guards the pumpkin patch and brews cinnamon cider instead of magic potions! Made from raggy patchwork squares, which give him a rustic look, he’s simple to sew and you don’t need to pay much attention to matching points, so you can relax and enjoy the making process. You’ll be sewing the seams on the outside and then fluffing them up with a brush to create a soft finish.
Strip piecingI used a technique called strip piecing for this project, which will speed up your patchwork. For this, I cut and joined 2in (5cm) wide fabric strips, then cut across them, again cutting 2in (5cm) strips, which I then joined up to create a patchwork of squares. This requires fabric strips cut across the full width of the fabric, and you can use up to twelve different fabrics for this project.
Make it your own!
- Create a spookier version with black, purple and silvery fabrics or opt for any colours you like, even rainbow colours. Try swapping to festive shades to make a Christmas gnome too.
- Add trimmings – what about a bell or tassel on the end of his hat or some festive decorations?
- This is a great opportunity to use up small scraps of fabric. Cut out 2in (5cm) fabric squares and join them together to make your patchwork fabric. You just need to make enough patchwork to cut out the body and hat pattern pieces – and remember to sew them wrong sides together!
By the end of this project, you’ll have:
- Discovered that sewing doesn’t have to be slow and precise to be fun and successful!
- Learned how to do strip piecing.
- Mastered the art of making a feature of frayed seam allowances.
You may also like:
- Halloween Pumpkin Kids Treat Bag
- Witch Gnome Sewing Pattern
- Pumpkin Table Set
- Easy Christmas Stocking Sewing Pattern
MEMBERS ONLY: To gain full access to the Half Yard Club projects please login or sign up
You will need:
Equipment
- Sewing machine with a standard foot
- Fabric scissors that are nicely sharp at the points
- Pins or clips
- Fabric glue – I used Gutermann HT2
- Scrubbing brush to fluff up the seams
- Tweezers or similar to help get the stuffing into the end of the hat
- Long doll needle
Materials
- Twelve 2in x 44in (5cm x 112cm) strips of fabric, I’ve used seven co-ordinating prints, but you could use more or fewer depending on what you have, these are the fabrics I used
- 20in x 10in (51cm x 25.5cm) rectangle of cream fabric for the head and nose
- 8in x 4in (20cm x 10cm) piece of green fabric for the leaf
- 7in x 2½in (18cm x 6.5cm) strip of long faux fur for the hair – note that the direction of the fur should run from one long edge to the other, and make sure you only cut through the backing fabric, not the fur, to keep the ends of the fur wispy (see the video)
- Toy filler
- Matching sewing thread
- Strong thread – I used embroidery cotton (floss)
- Optional: blusher for his nose
MEMBERS ONLY: To gain full access to the Half Yard Club projects please login or sign up
Project steps:
Step 1
This is content that only logged members can see! Please create an account or login to be able to view project steps, otherwise you'll be limited to non-member content.
This is content that only logged members can see! Please create an account or login to be able to view project steps, otherwise you'll be limited to non-member content.
Step 2
This is content that only logged members can see! Please create an account or login to be able to view project steps, otherwise you'll be limited to non-member content.
This is content that only logged members can see! Please create an account or login to be able to view project steps, otherwise you'll be limited to non-member content.