MEMBERS ONLY: To gain full access to the Half Yard Club projects please login or sign up
Quilted Tote Bag Pattern | Guest Designer Emily Bailey
Moderate |

Quick Links: What you'll need Project steps
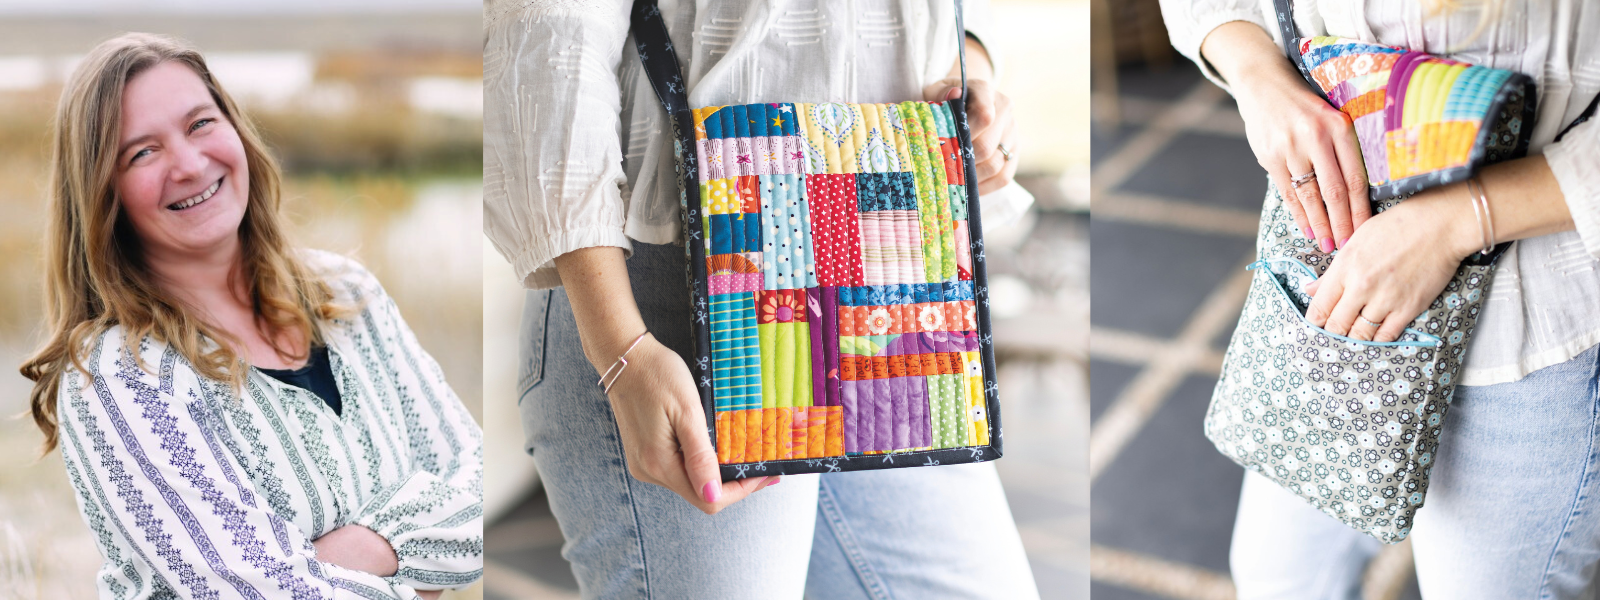
Designed by Emily Bailey, this chic eco-friendly courier bag lets you carry your essentials in style while putting fabric scraps to beautiful use.
Get ready to stitch, scrap and strut your stuff with Emily Bailey’s quilted tote bag! This isn’t just any bag – it’s secretly an eco-friendly masterpiece that turns leftover fabric scraps into a show-stopping front panel. Who knew your tiniest tidbits could make the biggest statement? Along the way, you’ll seamlessly level up your skills, learning to make a quilt sandwich, as well as mastering the art of precise quilting, topstitching, and binding. You’ll also tackle bag straps, a zip panel, and neat corners, all while having fun with techniques that make your tote both sturdy and stylish.
Finished bag measurement
2 × 7.5 × 9.5in (5 × 20 × 24cm)How to make crumb fabric
- Find two similar-sized scraps. If they don't have a straight edge, cut one. Place the scraps right sides together and sew along straight edge. Open out and press. Straighten up edges as needed. For odd-shaped pieces, line up straight edges on the lines on your mat so the pieces create a 90-degree angle and angled pieces overlap slightly. Cut through the overlapped pieces so the angles match.
- Emily suggests gathering triangular-shaped scraps in a pile. When you find two of a similar size, angle and shape, sew them together. Chain four or five of these units through your machine. Press your two-piece unit then find a scrap that will fit along one edge. Place right sides together and sew to join. Straighten up edges as needed.
- Continue to add scraps around the edge of the forming crumb fabric in a rall fence or Log Cabin fashion. As pieces get bigger, join two similar-sized pieces. Continue this process until the crumb fabric reaches the desired size. Before cutting, spray with starch to make it more stable.
- Making sure angles match creates crumb fabric that will lay flat. Don't worry about having lots of angles and weird shapes as they will occur naturally as you cut your crumb fabric.
About Emily Bailey
Emily Bailey is the creative force behind Aunt Em’s Quilts and a true queen of scrap quilting. Known for turning leftover fabric into stunning, functional quilts, she’s also the author of Scrap Quilts From Crumbs, Strips and Strings published by David & Charles. We recently caught up with Emily to chat about her quilting journey, what inspires her, and her love for turning tiny scraps into show-stopping projects. Discover the full interview over on our blog. You can also use your Half Yard Sewing Club membership discount code to get 30% off this book on the Search Press website.MEMBERS ONLY: To gain full access to the Half Yard Club projects please login or sign up
You will need:
Equipment
- Rotary cutter and cutting mat
- Quilting rulers
- Scissors
- Sewing machine with presser and zipper foot
- Machine needles: universal size 75/11 or 80/12
- Pins and clips
- Hand sewing needle
- Iron and ironing board
- Water-soluble marker or tailor's chalk
- High-quality 50-weight cotton thread
Materials
- Crumb fabric rectangle: 9 × 21in (23 × 54cm) - see above for guidance on making crumb fabric
- Contrast fabric: 22.5in (60cm)
- Strap and binding fabric: 13.5 in (40cm)
- Wadding (batting): 9 × 21in (23 × 54cm)
- Zip: 8in (20cm)
Cutting Instructions
Contrast Fabric:
- Backing of crumb outer panel: 9 × 21in (23 × 54cm)
- Top outer of zipper panel: 3 × 8in (7.5 × 20cm)
- Bottom outer of zipper panel: 7½ × 8in (19 × 20cm)
- Inner of zipper panel: 10 × 8in (25 × 20cm)
- Lining tabs: 2 rectangles, 3 × 2.5in (7.5 × 6cm)
- Side panels: 2 rectangles, 10 × 2.5in (25 × 6cm)
- Base: 2.5 × 8in (6 × 20cm)
Strap and Binding Fabric:
- Strap: one strip, 4in wide (10cm) across the width of the fabric
- Binding: three strips, 2.25 in wide (5.5cm) across the width of the fabric
MEMBERS ONLY: To gain full access to the Half Yard Club projects please login or sign up
Project steps:
Step 1
This is content that only logged members can see! Please create an account or login to be able to view project steps, otherwise you'll be limited to non-member content.
This is content that only logged members can see! Please create an account or login to be able to view project steps, otherwise you'll be limited to non-member content.
Step 2
This is content that only logged members can see! Please create an account or login to be able to view project steps, otherwise you'll be limited to non-member content.
This is content that only logged members can see! Please create an account or login to be able to view project steps, otherwise you'll be limited to non-member content.