MEMBERS ONLY: To gain full access to the Half Yard Club projects please login or sign up
Shopper Bag | Easy Sewing Project + Templates Download
Easy |

Quick Links: What you'll need Project steps
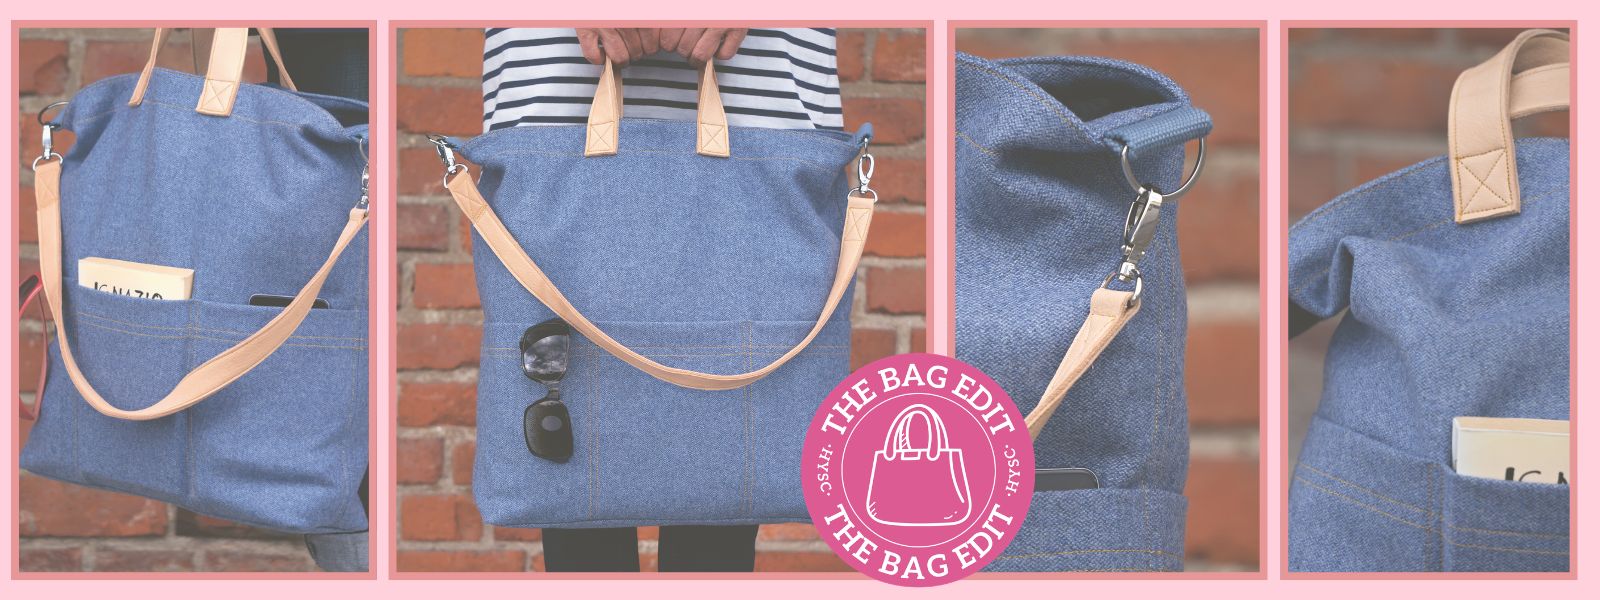
Part two of The Bag Edit has landed and we couldn't be more excited to share this fabulous shopper with you.
Every month on the 15th, we will bring you a brand new bag project. Did you make our bow handbag last month? This time it's all about this shopper all-rounder. With pockets inside (and out!) you'll have all the storage you need. It's easy to make, but the leather handles and shoulder strap give it a super professional finish.
Instructions
1. Press the Template button and cut out all the pieces as instructed and transfer the markings. Neaten the ends of the webbing or carefully seal them with a lighter (if using synthetic webbing). 2. Zigzag stitch the top edge of the inside pocket to neaten, then fold over 3cm (1¼in) to the wrong side and iron. Sew flap close to the edge and again at the width of your sewing machine’s foot. Press the seam allowances 1cm (½in) to the wrong side, and tack the right side of the pocket to the inner lining as marked. Sew close to the edge and again at the width of a foot. Sew the dividing seams of the inside pocket. 3. Fold the inner lining crosswise to the middle (right side on the inside) and tack the sides. Sew the side seams. Press the seam allowances apart and sew both sides at the width of a foot. 4. With the right sides facing, fold the open corners of the inner lining so that the side seam meets the middle of the base and the edges are flush. Pin and sew the cross seam. 5. Neaten the top edges of the outside pockets. Press 3cm (1¼in) to the wrong side, then sew the flap close to the edge and again a foot’s width apart. 6. Tack the outside pockets to the parts of the body with the sides and bottom edge flush. Sew within the seam allowance. Draw dividing seams (e.g. one pocket in half, the other in thirds) and double-stitch at the width of the foot. 7. Seam the sides. Press the seam allowances apart and sew both sides at the width of a machine foot. 8. Turn the bag to the inside and, with the right sides facing, tack to the base so that the clips meet the corners of the base on the sides. 9. With the right sides facing, sew the base from the side of the bag. Tack one side of the back flush with the edge to the first clip. Sew this section as far as the clip or to the first corner of the base, then proceed as described on page 35, Sewing corners for the base of a bag. Sew the entire base in place in this way. Trim the corner seam allowances at an angle and turn the bag right side out. 10. Cut the webbing into two 10cm (4in) pieces. Thread a D-ring on to each piece and sew the ends together. With the right sides facing, tack the tabs to the side seams (top middle) of the outer part so the D-rings are facing downwards and the ends of the webbing protrude 1cm (½in) over the edge of the bag. Sew the ends of the webbing within the seam allowance (A). 11. With the right sides facing, push the outer part of the bag and the lining together and pin along the top edge, leaving a 20cm (8in) turning gap. Pull the inner and outer apart and iron the seam allowances open. Turn the bag right side out and insert the inner lining. 12. Carefully press the top edge, turning the opening over, tack all around, and then sew close to the edge and again at 3cm (1¼in), closing the turning opening. 13. Use the the four leather straps to make two double-layered straps, as described on page 25. Tack the handles to the upper edge of the bag as marked. Sew close to the edge and in a cross. 14. Make a shoulder strap out of the long leather strap and bag spring hooks (see page 30), and attach to the D-rings.Tips
1. The handles and shoulder strap can also be bought ready-made. They are usually pre-punched, so they can be sewn on. They can also be easily attached with binding screws.2. The seam allowances will be concealed on the inside later on, so the edges only need to be neatened if you use a fabric that frays a lot.
3. Use the leather needle to sew the seams of any leather parts.
You may also like:
- Drawstring Bag
- Quilted Tote
- Quilt Block Bag
- Eco Lunch Bag Set
- Sewing machine needle for leather
- Firm upholstery fabric, wool, blue-grey, 120 x 140cm (47¼ x 55in)
- Nappa leather (approx. 1.5mm/1⁄16in thick)
- 2 bag spring hooks (2.5cm/1in inner dimension), in silver
- 2 D-rings (4cm/1½in inner dimension)
- 20cm (8in) webbing (4cm/1½in wide), matching colour
- Sewing thread, matching colour
- Extra-strong sewing thread in yellow (for topstitching)
- 2 x main pieces, 42 x 47cm (16½ x 18½in)
- 1 x base piece, 12 x 37cm (4¾ x 14½in)
- 1 x outside pocket, 25 x 47cm (10 x 18½in)
- 1 x inner lining, 92 x 47cm (36¼ x 18½in)
- 1 x inside pocket, 22 x 32cm (8¾ x 12½in)
- 4 x bag handles, 3 x 32cm (1¼ x 12½in)
- 1 x shoulder strap, 2.5 x 130cm (1 x 51in)
Size
Height: 40cm (15¾in)Width: 35cm (13¾in)
Depth: 20cm (8in) The required seam allowances are already included in the pattern pieces. Unless otherwise stated, the seam allowance for sewing is 1cm (½in).
MEMBERS ONLY: To gain full access to the Half Yard Club projects please login or sign up
You will need:
Equipment
Materials
Upholstery fabric:
Nappa leather:
MEMBERS ONLY: To gain full access to the Half Yard Club projects please login or sign up
Project steps:
Step 1
This is content that only logged members can see! Please create an account or login to be able to view project steps, otherwise you'll be limited to non-member content.
This is content that only logged members can see! Please create an account or login to be able to view project steps, otherwise you'll be limited to non-member content.
Step 2
This is content that only logged members can see! Please create an account or login to be able to view project steps, otherwise you'll be limited to non-member content.
This is content that only logged members can see! Please create an account or login to be able to view project steps, otherwise you'll be limited to non-member content.